Create and Manage Customers
Create an accurate customer record, find it in the ledger, keep the relationship context, and delete it safely.
Summary
Use this workflow to create a customer that is ready for invoices and team follow-up. Then keep the record accurate as the relationship changes.
Capabilities
The system allows users to create new customer records, check for existing entries, update individual or multiple customers, add context like notes, tasks, and files, and safely delete records after review. Customers can be linked to invoices, projects, and tagged for lifecycle management. Duplicate names and emails are permitted, but careful checks are encouraged to avoid confusion.
Prerequisites
Before You Start
- Select the correct team. Eigenn isolates customer data by team.
- Confirm that you are an Owner or Member and the workspace permits writes. Viewers cannot save changes.
- Search Customers for the name and email to avoid a duplicate.
- Gather the primary contact, invoice recipient, billing address, tax identifier, and any lifecycle tag that your team uses.
Concepts
Customer records are isolated by team within Eigenn and structured to support finance and collaboration needs. Tags represent the customer lifecycle or operational grouping. Notes, tasks, and files provide persistent team context. Deletions require careful review to ensure no crucial data is lost. There is no merging of duplicate customers or status field—instead, lifecycle tags signal customer states.
Workflow
1. Check for a Customer That Exists
- Open Customers.
- Select All.
- Reset active date, tag, and country filters; choosing All only clears the tab.
- Search the company name.
- Repeat with the primary email and contact name if needed.
- Open the likely matches.
- Compare their invoices, notes, and address.
Eigenn permits duplicate names and emails. If the correct record exists, edit it. For a multiword search, review the generated filter chips so an unintended country, tag, or group does not hide a match.
2. Open the Customer Form
Select Create customer from the customer header or empty state.
You can also create a customer from the customer selector in an invoice. In that flow, Eigenn returns to the invoice and selects the new customer after a successful save.
3. Enter the Necessary Identity
Under General:
- Enter a customer name with at least two characters.
- Enter a valid primary email.
- Add a billing email when invoice messages must also go to a finance mailbox.
- Add the contact person's name.
- Add the phone and website when useful.
- Enter any team-defined values under Custom fields. The definitions are managed separately in Settings → Customer fields.
The primary email is still necessary even when a billing email is present.
When the primary email uses a company domain and the website is blank, the form fills the website with that domain. The form does not use a personal-mail domain such as Gmail or Outlook for this suggestion.
4. Add Billing Details
Expand Details.
- Search for the customer's address, or enter the address manually.
- Confirm Address Line 1 and optional Address Line 2.
- Select the country.
- Use the country selector so Eigenn saves both the country name and code.
- Enter the city, state or province, and postal code.
- Add the tax ID or VAT number.
- Select the tags that organize the customer.
- Add a general internal note when the relationship needs persistent context.
The address search fills available fields. It does not replace your review. Confirm the country and postal details before invoicing.
5. Create the Customer
- Check the name and both email fields.
- Confirm the address and tax data that will support invoice creation.
- Select Create.
- Wait for the form to close.
The create button stays unavailable until the necessary fields are valid and you change the form.
6. Confirm the Record
Return to Customers and check:
- the customer appears in All
- the name, contact, email, location, and phone are correct
- the tag chips are present
- Invoices, Projects, Revenue, and Outstanding show
-or zero for a new customer - Customer Since shows the recent creation
Open the full customer page. Then check the contact and address details in the right panel.
If you created the customer from an invoice, confirm that the invoice now shows the correct customer. Do this before you add line items or deliver the invoice.
7. Add Team Context
Open the full customer record.
Add a note
- Select Notes.
- Enter the decision or relationship context, up to 2,000 characters.
- Select Save note.
- Confirm the author and timestamp.
Add a task
- Select Tasks.
- Enter a title of up to 200 characters.
- Add an optional description of up to 2,000 characters and a due date. There is no assignee field; name the responsible person in the description.
- Select Add task.
- Advance it through To do, In progress, and Done as work progresses. Selecting the status after Done returns it to To do.
Add files
- Select Files.
- Drag files into the upload area or choose them from your device.
- Wait for both the storage upload and file-record save.
- Confirm each file appears and opens. A multi-file batch can partly succeed, so check existing files before retrying a failed batch.
Notes and tasks delete immediately from their lists. Customer files ask for confirmation before deletion.
8. Create Related Work
From the customer record or row action menu:
- choose Create Invoice to start an invoice with the customer preselected
- choose Chase overdue to open overdue invoices for this customer
- use the invoice count to open all customer invoices
- use the project count to open related Tracker projects
Do not use Add to List as an action for organization yet. At this time, it shows a beta notice. It does not create list membership.
9. Edit a Customer
- Open the customer.
- Select Edit.
- Correct the necessary and optional fields.
- Add or remove tags.
- Select Update.
- Reopen the record.
- Confirm the saved values.
Standard details and changed custom fields can save separately. If the form says standard details saved but custom fields failed, review what persisted and retry the fields; the first save is not undone.
An edit to a customer does not retroactively change an invoice snapshot. Correct the invoice separately when the customer information that it shows is wrong.
10. Update Many Customers
From the customer table:
- Select the customer checkboxes.
- Use Tags to add or remove a shared tag.
- Use the country selector to replace country and country code.
- Clear the selection when you finish.
There is no bulk Status operation. Use a lifecycle tag and note instead. Tags alone do not stop recovery or reminders. Selection applies only to loaded rows; verify the selected count before applying a bulk change.
For a repeatable working list, use the All customers saved-views menu to save the current filters, sorting, and columns. A dynamic segment also calculates membership and can trigger configured segment-entry workflows; see Customers before creating one.
11. Delete Only After Review
Before deletion:
- Open the full customer record.
- Check the invoices, notes, tasks, files, and projects.
- Download any customer file that you must keep.
- Move the necessary relationship context to a record that you keep.
- Review recurring invoices and active recovery work as well. Deletion clears customer links on invoices, recurring definitions, cases, and promises; it removes linked Tracker projects with their time entries and recovery instances with their communications. It does not guarantee storage cleanup or erase retained invoice snapshots.
Select Delete from the full record and confirm the prompt.
Do not use row-menu deletion for planned cleanup. It runs immediately without a confirmation dialog. Bulk deletion has a confirmation step. You must still examine the record first.
Behavior specification
Troubleshoot
Create or Update is not available
Make a change, enter a name of at least two characters, and correct the primary or billing email error. The form needs a valid dirty state before submission.
The customer does not appear after creation
Select All, clear search and filters, and confirm the active team. Scroll to load more results if the team has a large ledger.
The country filter cannot find the customer
Check the active date, tab, and tag conditions first. Country filters match either saved names or codes, but the chooser gets options from only the first 100 customer records. Clear the country filter, search by name, and correct the saved country if needed.
The website looks different after saving
The form removes HTTP or HTTPS from the saved value. The customer contact link adds HTTPS when no protocol is present and opens the site in a new tab. Confirm that the stored domain itself is correct.
A duplicate already exists
There is no merge action. Choose the customer to keep. Reproduce the necessary notes, tasks, tags, files, and relationships there. Then examine the duplicate's invoices before you delete it.
There is no status or archive control
Use a team-approved lifecycle tag and record the reason in a note. Treat that label as your team convention, not as a delivery block or a reversible archive.
Diagrams
Rendering diagram…
Screenshots
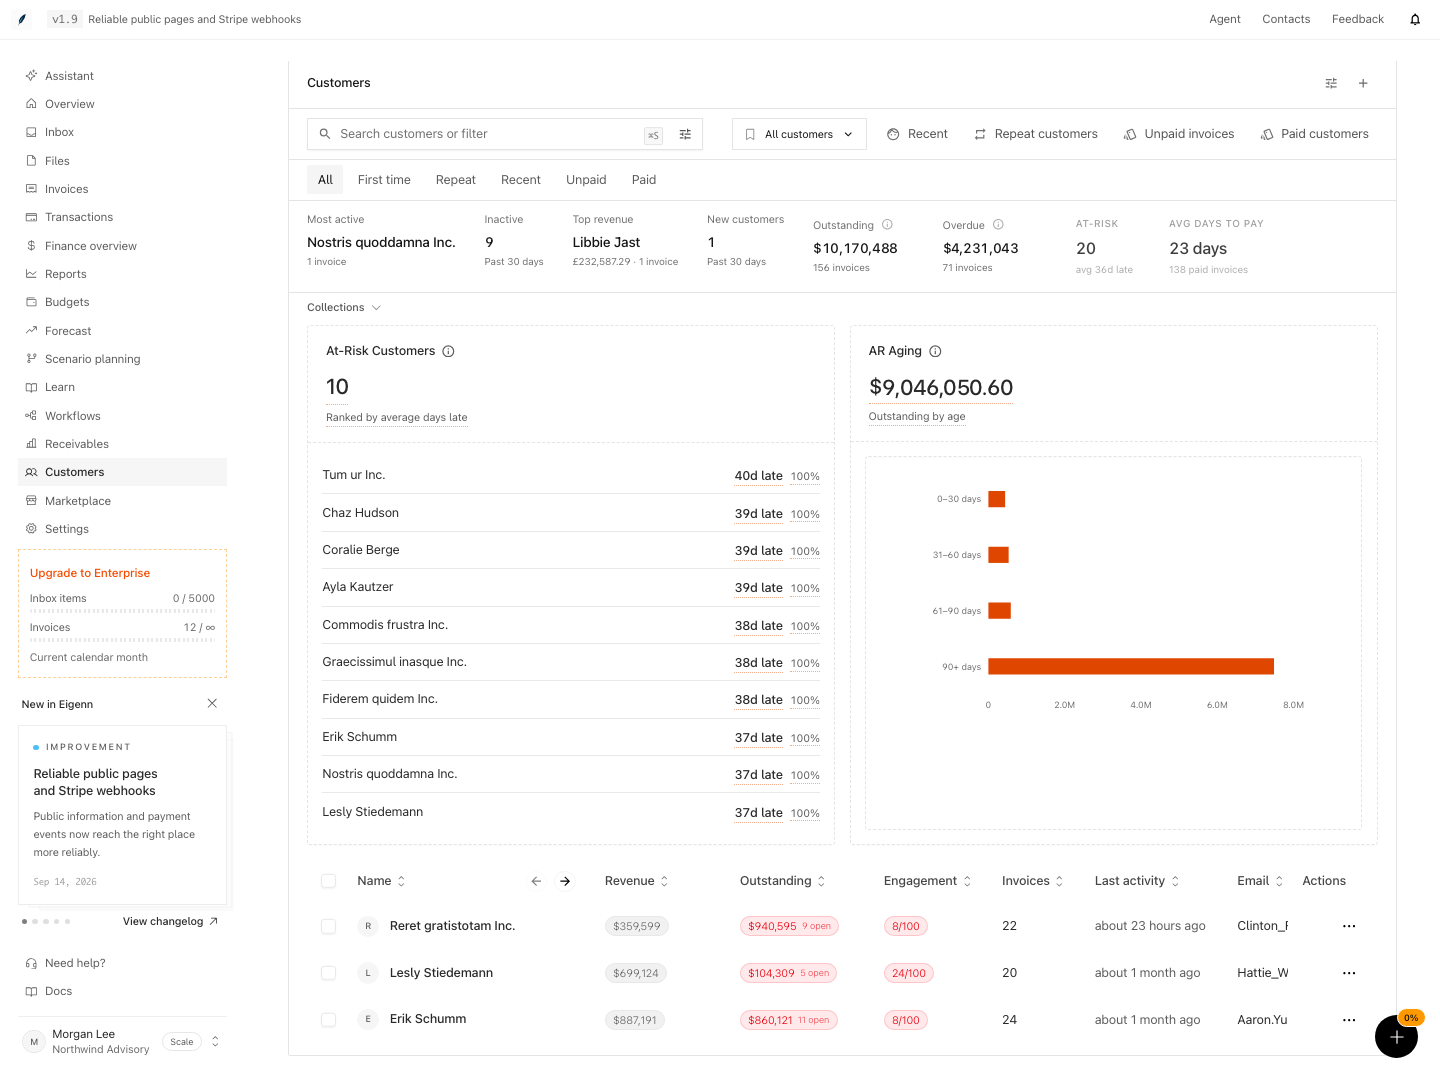
Shown with synthetic data in a local workspace.
Verification
Confirm the Result
- The customer is in the correct team.
- Primary and billing emails have the intended purposes.
- Address and tax details are invoice-ready.
- Tags match the team's convention for operations.
- Notes and tasks name the next owner and action.
- You checked the financial signals against the invoice status.
- No duplicate customer splits the history.
- You examined any deletion from the full record first.
- Create a customer and confirm it appears in the All customers view and displays the correct name and contact information.
- Ensure both primary and billing emails have their intended use.
- Verify that the address and tax ID are present and match invoice requirements.
- Check that team tags, notes, and tasks reflect the correct owner and next step.
- Confirm there are no duplicate records for the same customer.
- Before deleting a disposable record, review invoices, recurring schedules, notes, tasks, files, Tracker time, and recovery history. Verify which links remain and which context is removed.
- Change standard details and custom values together under a controlled custom-field save failure; confirm the partial-save message and retry behavior.
- Confirm that bulk operations affect the selected loaded rows, and that a lifecycle tag does not itself stop an enrolled recovery sequence.